¶ Maintenance
Accumulation of dirt and debris on the motion system components will cause uneven or rough engraving, loss of engraving position and premature failure. Accumulation of smoke or dirt on optics can result in loss of laser power and premature failure. It is important to keep your laser system as clean as possible to ensure trouble free operation and best results from laser processing. Always turn the laser engraving system OFF and unplug it before performing any cleaning procedures.
¶ Maintenance Schedule
We recommend the following schedule:
-
As necessary
- Clean engraving table
- Clean main enclosure
- Clean top door window
-
Every 8 hours of engraving
- Clean X-Axis and Y-Axis and bearingtracks
- Clean X-Axis belt
- Check beam window, #2 mirror, #3 mirrorand focus lens for debris. Clean ONLY if dirty.
-
Every month
- Clean cooling fan filters
- Clean Z-Axis lead screws with white lithium grease
- Check for X-Axis and Y-Axis belt wear. Replace as necessary.
- Check and/or clean X-Axis and Y-Axis drive gears
- Check for X-Axis and Y-Axis bearing wear. Replace as necessary.
- Inspect system for loose screws and mechanical parts. Tighten if necessary.
-
Every 6 months
- Clean exhaust plenum
¶ Motion System Components
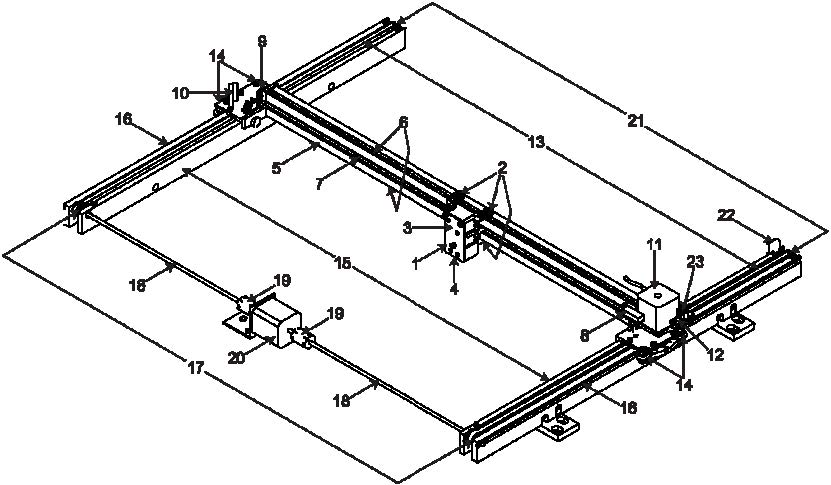
Note: #2 Mirror Cover and X-Axis Motor Cover have been removed for visibility.
- Focus carriage
- X-Axis bearing (3)
- #3 mirror (inside cover plate)
- Focus lens (inside cover plate)
- X-Axis rail (arm)
- X-Axis bearing track (2)
- X-Axis belt
- X-Axis home sensor flag
- X-Axis idler pulley
- #2 mirror
- X-Axis motor and drive gear
- X-Y home sensor board (upper flex board)
- Y-Axis belt (2)
- Y-Axis bearing (4) (2 on right side Y-Axis rail, 2 on left side Y-Axis rail)
- Y-Axis rail (2)(one right side and one left side)
- Y-Axis rail bearing track (2) (one on right side, one on left side)
- Y-Axis drive gear (2) (one on right side, one on the left side)
- Y-Axis shaft (2) (one on right side, one on left side)
- Y-Axis shaft flex coupler (one on right side, one on left side)
- Y-Axis motor
- Y-Axis idler pulley (2) (one on right side, one on left side)
- Y-Axis home sensor flag
- Flex cable (not shown)
¶ Cleaning and Maintenance Supplies
- Mild soap solution mixture of 1 tablespoon (14.78 ml) liquid soap and 1 quart (liter) of water in a spray bottle
- Window cleaner
- Paper towels
- Cotton cloth
- Denatured alcohol (do not use on any painted surface, plastic or the Top Window)
- Acetone (can be used on the engraving table, but nowhere else)
When using acetone or denatured alcohol, please follow the instructions on the printed label of these materials for safe handling procedures.
- Cotton swabs (supplied)
- Lens cleaner (supplied)
- Vacuum cleaner
- Set of Allen wrenches sized from 0.050 to 3/16 inch
¶ System Cleaning and Maintenance
¶ Motion System
- Turn off and unplug the laser system.
- Open the top door and thoroughly remove all loose dirt and debris from inside the laser system with a vacuum cleaner.
- Clean the processing table surface with either a soap solution, or alcohol, and a cloth or paper towels (acetone can be used in extreme cases to remove gummy deposits, but should be handled carefully as it will melt plastic components of the laser system). Never pour or spray any solution directly into the laser system. Always dampen your paper towel or cloth with the cleaning solution outside of the laser system and then wipe down the parts you are cleaning with the dampened cloth.
- Clean X-rail and Y-rail by using either the cotton swabs or paper towels and soap solution. Pay close attention to the bearing tracks since any debris left to build up in these bearing tracks will cause the bearings to wear and the engraving quality to become uneven.
- After the rails and tracks are cleaned, use a clean swab or paper towel and soap solution to clean all of the bearings by holding the swab against each bearing and moving the motion system by hand to roll the bearings against the swab. There are seven bearings in the system, three on the focus carriage, two on the left side of the X-rail and two on the right side of the X-rail.
¶ The Main Enclosure
- Clean the top window with a cotton cloth or paper towel and window cleaner. The top window is made out of glass; therefore, do not use abrasive cleaning cloths because they will scratch the glass. Also, do not use abrasive chemicals as these chemicals will damage the glass. Only use cleaners compatible with glass.
- Use a soft cloth or paper towels and the soap solution to clean the enclosure. Do not use alcohol, acetone or any other harsh chemical as these will damage the paint.
¶ Optics
A visual inspection of the #2 and #3 mirrors, beam window and focus lens should be performed at least once a day.
Do not clean an optic that is visually clean. Excessive cleaning can damage the optical coatings. To prevent contamination, wash your hands thoroughly before handling and cleaning any optic. Try not to touch the optical surfaces with your fingers, handle optics only by the edge or optical housing. Fingerprints can damage the optical coatings.
Never clean any optic right after engraving or cutting because the optic may be hot and the cool lens cleaning solution may thermally shock the optic and crack it.
¶ #2 Mirrow
To gain access to the #2 mirror, the mirror cover must be removed. Remove the thumbscrew and slide the cover to the right and then lift the cover straight up.
Inspect the #2 mirror and clean it only if there is debris present. To clean the #2 mirror with a cotton swab, moisten the cotton swab with the lens cleaning solution supplied with the laser system. Do not use other types of cleaners or solutions. Gently roll the cotton swab across the mirror once. Do not drag the swab or roll it back and forth as this can scratch the mirror. If the mirror did not come clean, use a fresh cotton swab and repeat the procedure.

¶ #3 Mirror and Focus Lens
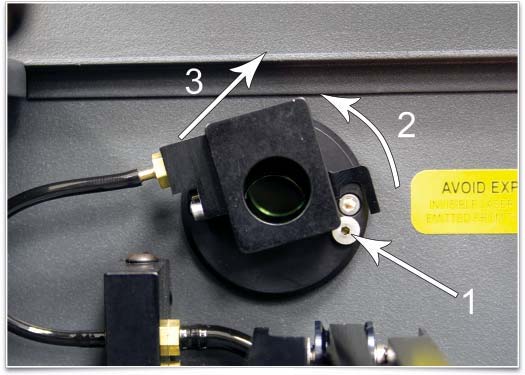
- The #3 mirror and the focus lens are both mounted to the front cover.
- To gain access to the #3 mirror (3) and the focus lens (4), hold the front cover (2) with one hand and remove the three thumbscrews with the other hand. Pull the front cover straight out.
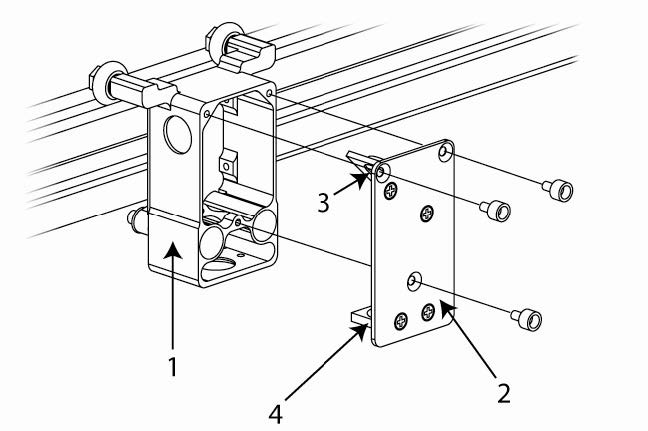
- Tilt the front cover enough to enable you to apply the lens cleaning solution directly to the #3 mirror and to the focus lens.
- Flood the reflective surface of the #3 mirror with the solution. If heavy debris is present, let the solution soak in for a minute.
- Roll a fresh cotton swab across the mirror in one direction. Use a fresh swab for each pass. Be gentle when cleaning the optic to avoid scratching the surface. Repeat this procedure for the focus lens, but make sure you clean both sides of the lens.
¶ Beam Window or Collimator
The beam window or collimator is where the laser beam enters into the processing area. It is located in the upper left hand corner of the engraving area against the back wall and is yellow in color. It is only necessary to clean the front side of the beam window. Do not remove the optic to clean it; simply clean it in the same
manner as the #2 mirror.
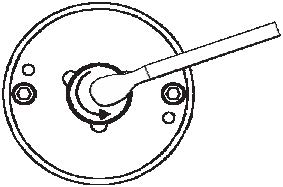
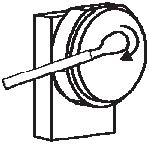
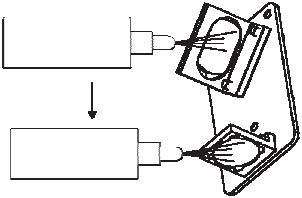
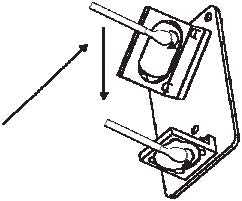
Note: If your system is equipped with Air Assist, you must remove the optics protection housing to gain access to the optic to clean it. Rotate the beam window cover counter-clockwise (2) and then off at a 45-degree angle (3). If the beam window cover is stuck, use a 1/16 Allen wrench to slightly loosen the screw (1) and try again. Set the cover off to the side and clean the optic, if necessary. Reinstall the beam window cover being careful not to scratch the optic.
¶ Exhaust Plenum
- Power on the laser system and UCP.
- Using the Z-Axis buttons on the laser system or UCP, raise the Z-Axis table as high as possible.
- Power the system OFF.
- Open the front door.
- Locate and remove the four socket head cap screws found on the inside of the laser system.
- Using both hands, reach in and grasp the exhaust plenum.
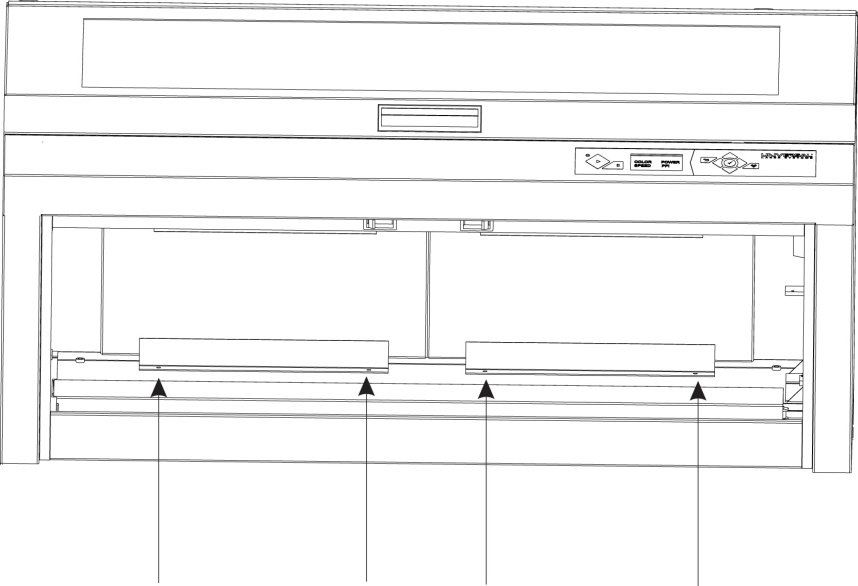
- Lift the plenum straight up until the tabs of the plenum clear the two flat head screws on which they are resting. Tilt the bottom of the plenum towards you and remove it from the system.
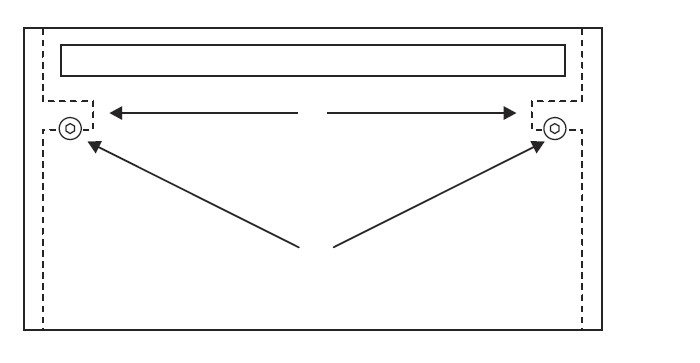
- Using the soap and water solution, clean the inside of the plenum as well as the inside rear wall of the laser system.
- Installation is opposite of removal. Verify that the plenum tabs (1) rest on the two flat head screws (2).
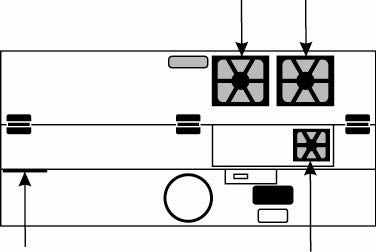
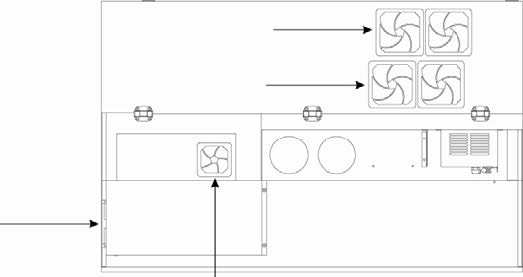
¶ Cooling Fan Filters
This air-cooled laser system will require periodic cleaning of the cooling fan filters. Since ambient air is used to cool a laser cartridge, the air must be filtered before it passes through the laser. Dust contamination in the intake filter may reduce the cooling fan’s ability to keep the laser cartridge, as well as the CPU and power supply, from overheating. An overheated laser cartridge will lose laser power during engraving and will eventually shut down completely.
To service the filters, first turn OFF and unplug the laser system. To remove the filter(s), simply snap off the black cover and remove the foam element. Wash the element in a soap and water solution, dry and re-install.
Never operate the laser system with the cooling fan filters removed as dust and debris can build up in the laser cooling channels, thus leading to overheating.
¶ Adjustments and Lubrication
Periodic adjustments are not normally required. The bearings in the motion system will self-adjust to take up any clearances as they begin to wear. The belts are fiber-reinforced and will not stretch under normal use, so periodic tension adjustment is not necessary. All bearings in the system are sealed and do not require lubrication. Do not lubricate the tracks that the bearings ride in. The only lubrication that may be required is to the screw threads for the Z axis lifting mechanism. Over time contaminants may adhere to the lubricant which can cause the engraving table to bind up. Periodically wipe off the contaminated grease with a soft cloth dampened with alcohol and apply fresh white lithium grease to the screw threads. Never spray any degreasing solutions directly onto the threads. Run the table up and down to work in the fresh grease.
Note: If you have any questions about maintaining the laser system, please contact our Customer Service Team at ULS.